Welcome to the 5th post in Photo Series 3: Photography in the Abstract. Today’s topic is pretty damn cool. It’s about “small” photography, i.e. the kind of photography that looks better when viewed as small. Up until this point, all of the pictures on this blog have been presented in “large” form: as large as can be while still being able to see the entire picture on a single computer screen. Today there will be no large photos, only small. First, we’ll ask our classic Photography in the Abstract question: what are the different ways that you can compose small photography? Then we’ll find out the optimal technique to take small pictures. Then we’ll expand that optimal small system to optimal systems for any given mode of photographic presentation. It’s a long post (but worth it, I swear). Let’s go!
How do you compose a great small photograph?
There are many ways to take a great small photo. Today we’ll just talk about photos in which the smallness helps the subject (rather than the composition [the whole]). And remember, these are photos in which the smallness actually helps the picture — merely looking good while small is not enough. It must be the case that [small photo] > [big photo]. To truly be convinced, I recommend clicking on the photos to see them in their ugly, large state.
Smallness Turns Small Dots into Smaller Dots
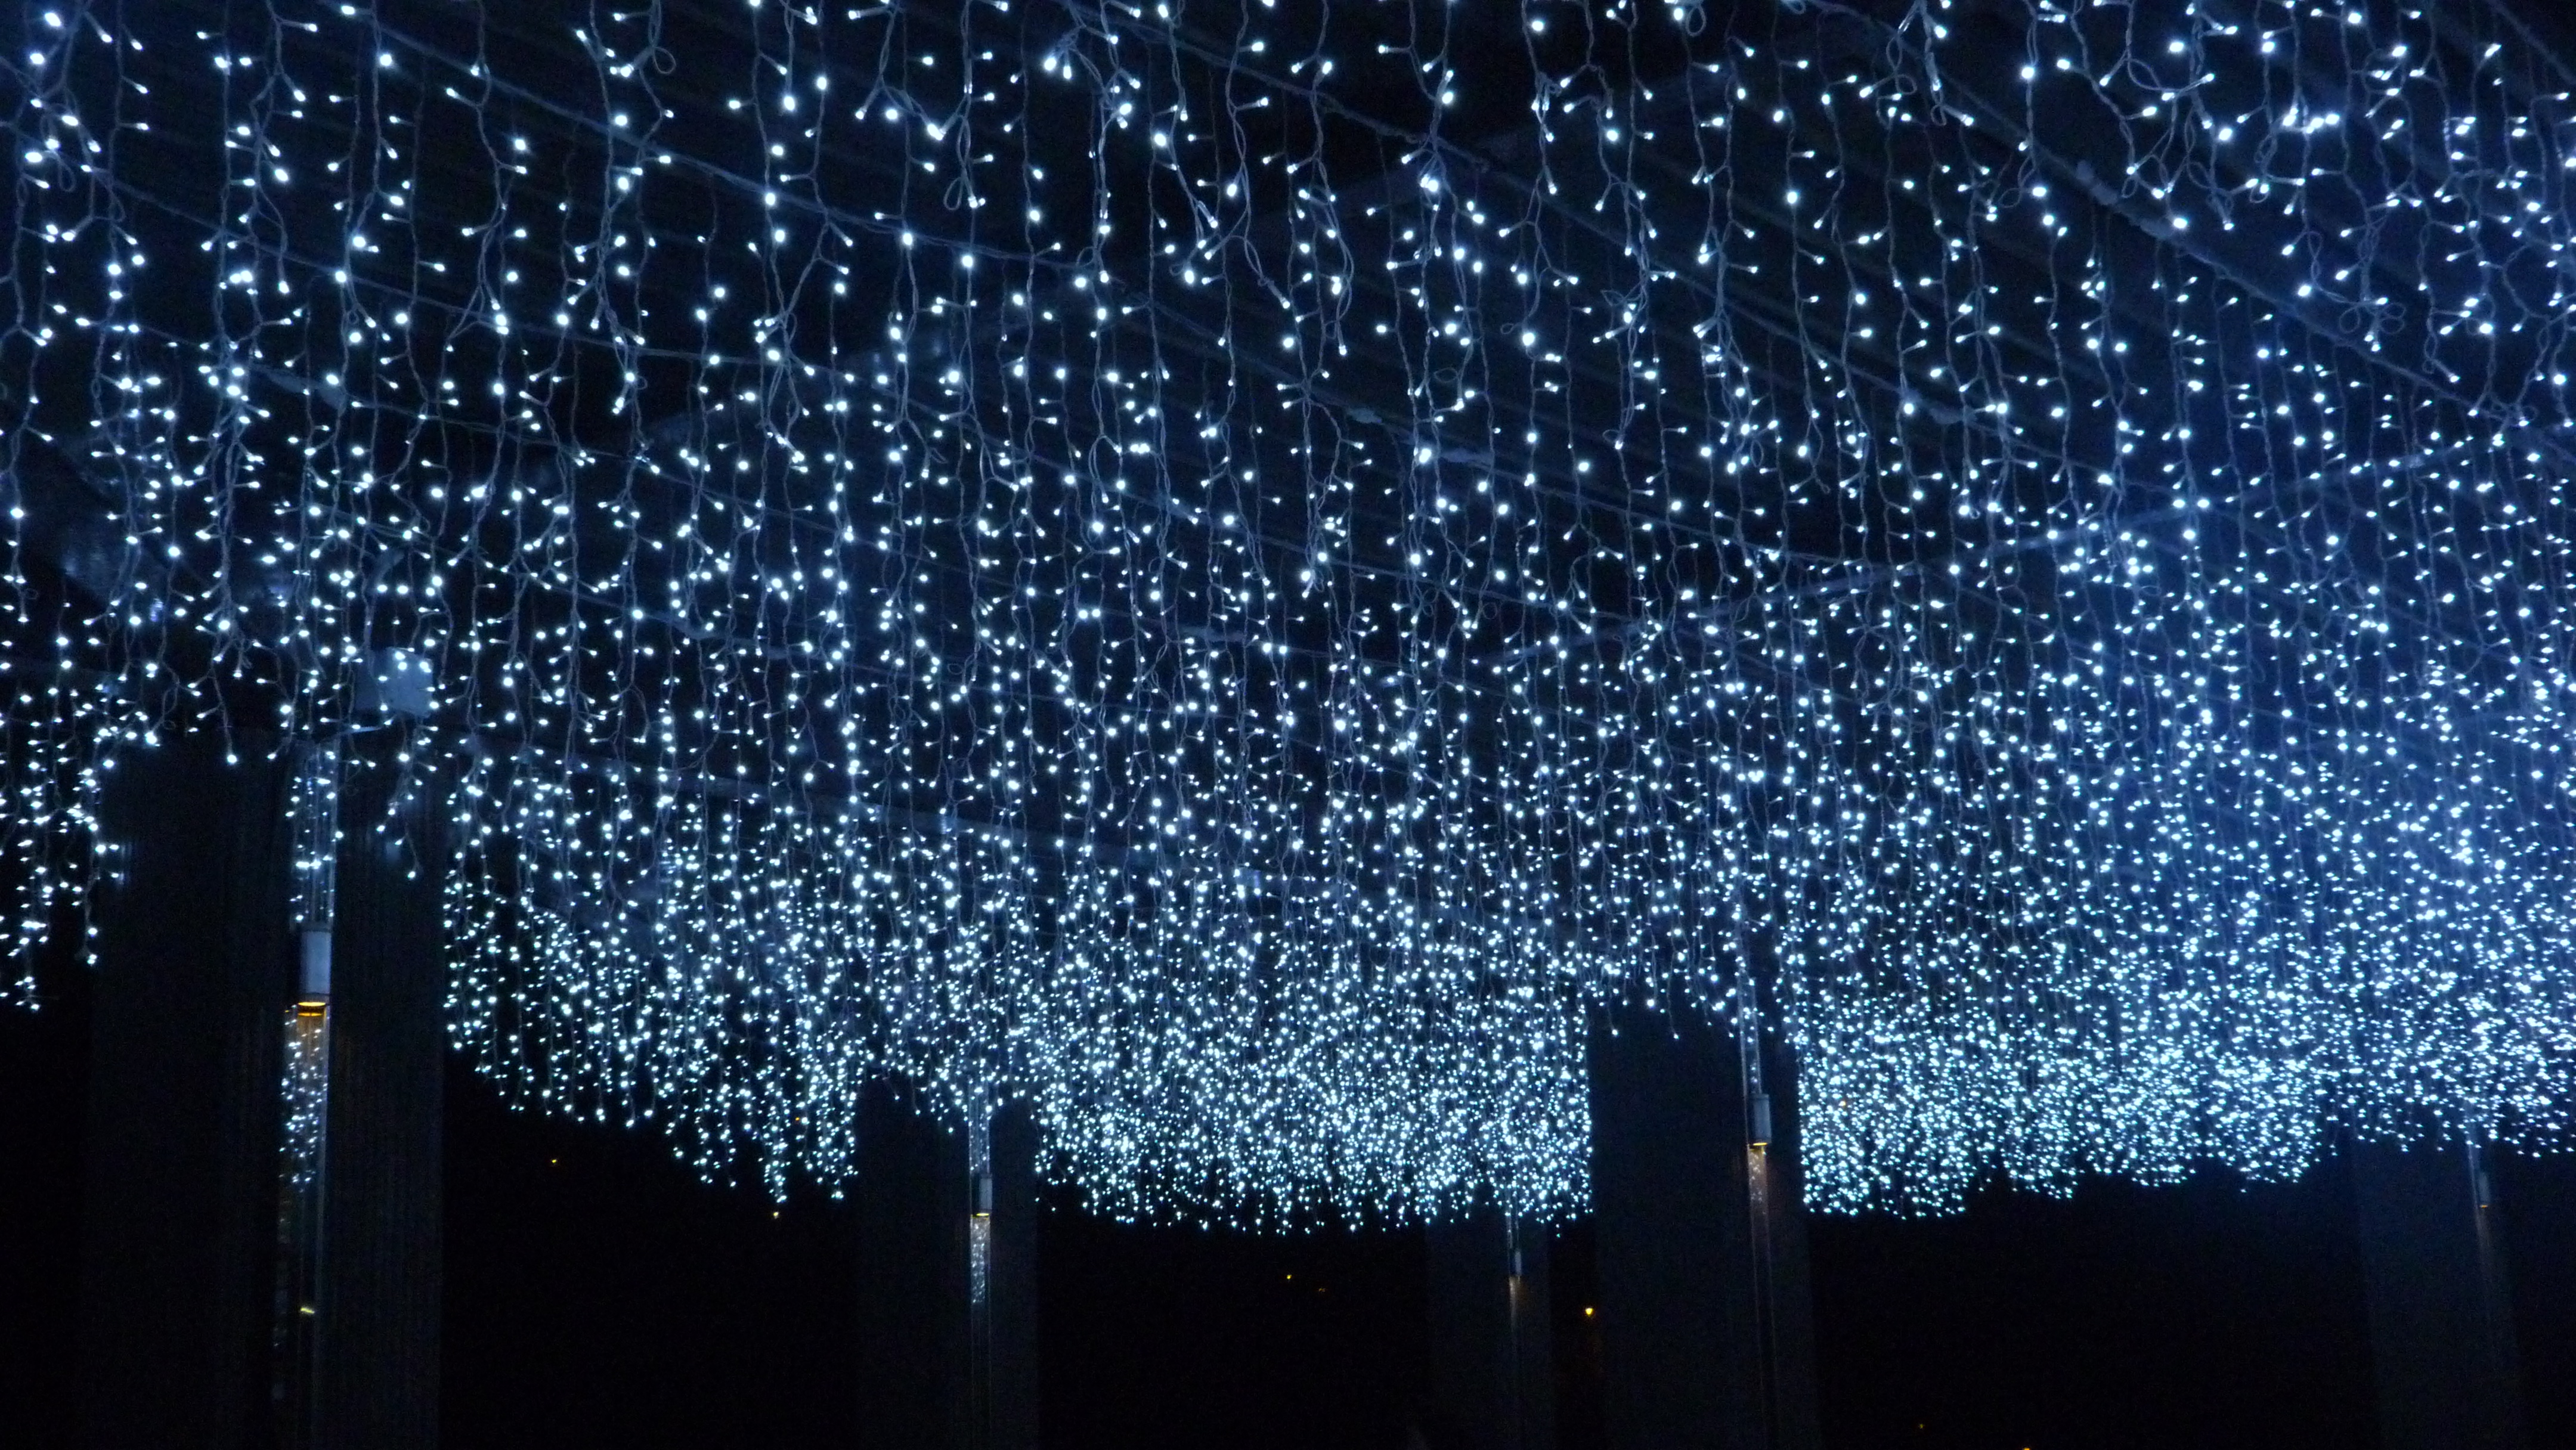
Instead of seeing a bunch of individual Christmas lights, we see a sky of stars. [Victoria Peak, Hong Kong, China]

Like the picture above, the density is emphasized by small spaces becoming smaller, by the lights at the far end nearly vanishing. [Chengdu, China]
Smallness Creates Correct Zoom Level For Texture

When this picture is full size, you can distinguish individual fish a bit too well. When small, this picture instead shows a wall of fish. See Finding Nemo’s school of fish: http://goo.gl/yZl3Or. [Panda Zoo, Chengdu, China]

The reflective texture on the lightbulb wants this level of detail. Too large and you can start to pick apart its imperfections. [My House, Fenyang, China]
Smallness Emphasizes Correct Part of Shape

The key visual idea here is how the triangles are stacked on the straight line. This level of abstraction is exactly what we want. Triangles. Lines. Black. Detail would be counterproductive. [Bridge Across Frozen River, Harbin, China]

These are strange objects. The left seems to desire the right. Perpetual motion spurred by want. When zoomed in, we start to see the texture and need to move our eyes in order to see the two objects. Both of these hurt the emphasis on pure form. Thus, small > large. [Chongqing, China]
Smallness Emphasizes Shape of Human, Rather Than Face

Much like the category above, the subjects in these pictures are doing something defined by a zoom level OUT. The kid here is interesting because of the excitement conveyed by his body position, not his face. [Public Fishing Pond, Chengdu, China]

Many empty seats. Guard. Straight back. Hands behind back. Dark clothes. Chinese Red. Hat. None of those words are face. QED. [Shanghai Basketball Game, Shanghai, China]
Smallness Emphasizes Groups of Color

The idea here is that there’s a blob of color. Blobs are amorphous and are therefore helped by the ambiguity as a result of smallness. The particular pic is pretty ridiculous. Person biking with 100+ balloons. Can’t even see him/her. [Dongguan, China]

The idea of color, rather than specific colors themselves. This picture has 3 sections of color: umbrella and two reflections. [Shanghai, China]
Smallness Allows Blurry Mist

Mist/pollution/smoke is difficult to take pictures of, especially in the dark. It’s possible, but you need to increase the camera’s ISO level, creating gross pixelization. Viewing the picture as small keeps the best parts of the air — the aura of gradient light, while reducing the worst — blurriness. [Shanghai, China]
See that non-blurry reflective fog! [The Bund, Shanghai, China]

Love the lighting here. Dust clouds illuminated in the night. [Chongqing, China]

Same foggy night as pictures 1 and 2. [Shanghai, China]
Finding a Small Creation Medium For a Small Consumption Medium
Now that the types of small pictures have been outlined (above, dummy), let’s look at how to take small photographs. To understand how to create this work, we need to look at how it will be consumed. And that’s in small form. You (the viewer) look at it here, on this blog, as a 400×225 pixel image. I want it to look good in this medium. To look good here, I should try to take 400×225 pictures. Creation medium = consumption medium. Take small pictures for a “View As Small” medium.
I didn’t do consciously do this. I just took pictures “through” my LCD screen on my camera. I use the LCD screen as my viewfinder for other reasons. Creating “View As Small” pictures was an unintended consequence. It happened as I was going through my 10,000+ China photos. My sorting process was dictated by the goal — “Find Patterns” (those patterns have turned into the posts that you’ve read on this blog). I started to notice a strange pattern where my positive expectations for a given picture were shattered when I looked at the picture full screen. I’d get pumped by the thumbnail, only to be disappointed by the fullscreen photograph. It only happened with horizontal photos (see all the photos above) where the difference between thumbnail size and fullscreen size was greater (width is 6x greater * height is 5x greater = 30x more area for horizontal pictures vs. 1.5*2 = 3x more area for vertical pictures). Pictures were no longer “trash” if they looked bad big, they were just “View As Small”-ers. Like the runt of the litter. Just different.
And there were a lot of runts (nearly 50 high-quality photographs). Why did I take so many “View As Small” photos? It’s because every picture that I took was a “View As Small”. Here’s an example. I’m trying to get a sweet picture of a sea of white Christmas lights in Hong Kong. I move a bit. I stretch my arm to the left. I look at it my LCD viewfinder. And…..yeah! That looks pretty damn sweet! Click. But it only looks sweet on a 400×225 pixel screen. Who the hell knows if it’ll look good at 1600×900? Boom. View As Small picture taken.
Creation Medium = Consumption Medium
I was on a backpacking trip with my brother a month or two ago and was telling him about my View As Small blog post (this). He was hatin’ on me for using the LCD instead of the stick-your-eye-to-it viewfinder. I was trying to convince him that the LCD viewfinder must be optimal for, at the very least, View As Small pictures. He wasn’t quite convinced until I gave him the larger implication: the consumption medium should always dictate the creation medium.
This idea affects the simple size of the photo. Small dictates small. Large dictates large. But we should definitely go further. If I know that my pictures are going to be viewed on a computer screen at 400×225, then I should create that environment when I take the picture. My camera should look like this:

If I wanted to shoot optimal [View As Small + Be Viewed On This Blog] photography, I should take pictures using the camera interface above. (You can imagine a WordPress iPad app that has this functionality.)
As another example, let’s pretend we are Tim Cook (Apple’s new CEO) and are planning for this year’s Apple Event. We are going to showcase the new photo roll screen. This:

If we assume that we will only see the photos in thumbnail form, then we should take the pictures with an LCD screen that looks like this:

To go one step further, we shouldn’t take the pictures on a normal iPhone. Instead, take the pictures on an LCD that looks like this but is huge and projected onto a screen (like at the Apple Event).
This may seem a bit extreme. But I think the original concept (medium = medium) still holds and should be applied more often. To push even more to an extreme, we’d start to address the environment outside the screen. e.g. Most people read this blog listening to music through headphones while sitting on a couch, petting their cat. I need to recreate that situation to take the optimal picture (some kind of weird wheelchair contraption with a very well-trained [or well-A.I.-ed] kitty).
Another implication of this medium = medium idea comes by solving the equality from the other direction. Until now we have let the consumption medium dictate the creation medium. Instead, let’s construct the consumption medium from the creation medium. For my point-and-shoot, the blog would look like this:

And the blog would be much much lamer.
Until Next Time
I usually try to keep my blog posts to about half of this length, so I’m especially interested in your feedback on a long-form article like this one. Let me know what you think! Also, stay tuned for the second View As Small post. It’ll be more pictures and less theory.
Thanks for reading!
– Rhys
